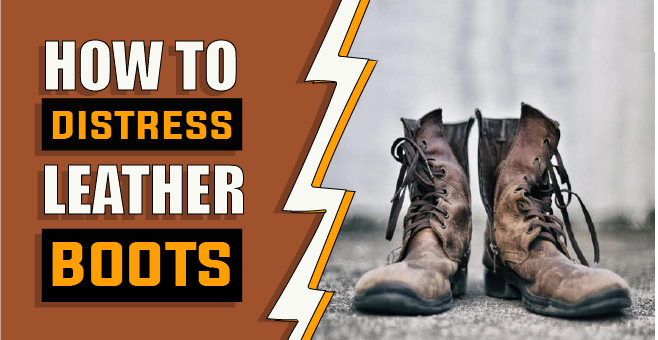
How to Distress Leather Boots – 3 Effected Methods
Boots are a category of footwear that is frequently constructed of leather. Given their durability and comfort, they are also one of the most preferred footwear. Typically, most boots cover the feet and the ankle area of your foot and are often worn by men and women. Furthermore, each pair of boots brings some questions to mind as they are not just an accessory but are also a functional part of our work life. Among these questions, there is one that is not so common but is still asked nevertheless. It is, how to distress leather boots? This blog post will show you how to properly distress your leather boots. Which is a process that can add some character and uniqueness to your boots, and is something that anyone can do with a little bit of time and effort. So if you want to learn how to efficiently distress your leather boots, keep reading!
Let’s discuss how to distress leather boots
Many people consider boots to be a wardrobe essential, yet they can also be quite pricey. Learning how to distress leather boots is a terrific way to save your money. It is also a good way to give your old boots a new lease on life. You can distress leather boots using a few different techniques.
Method #1: Use Sandpaper
Sandpaper is a great way to distress leather boots because it’s easy to use, and you can control how much distress you want.
What do you need?
- Sandpaper (coarse and medium grit)
- Water
- Leather conditioner
- Wax or polish (optional)
Instructions:
Step 1. Gather all necessary materials:
Your first step should be to gather all the necessary supplies. This includes sandpaper in both coarse and medium grits, water, leather conditioner, and wax or polish (optional).
Step 2. Wet the boots:
Next, wet the boots with water. This will keep the leather from drying out and splitting as you work on it. The importance of this step increases as you use sandpapers with a higher grit.
Step 3. Start sanding:
Once the boots are wet, start sanding them with coarse grit sandpaper. Focus on places like the toes, heels, and sides that are generally more prone to wear and tear.
Step 4. Switch to medium grit:
Once you’ve gone over the boots with the coarse grit sandpaper, switch to the medium grit and sand it again. This will help to smooth out any roughness from the previous step.
Step 5. Finish up:
Once you are satisfied with the level of distressing you can stop sanding and can wipe the boots down with a damp cloth. Apply a leather conditioner afterward to prevent the boots from drying out.
Step 6. Apply wax or polish (optional):
If you want, you can apply wax or polish to the boots for extra protection. This is extremely crucial if you intend to wear them in bad weather.
And that’s it! By following these steps, you should have a pair of distressed leather boots that look great and will last for years to come.
Method #2: Use a Wire brush
If you’re looking for a more distressed look, then using a wire brush is a great way to achieve it. Simply brush the leather in the direction you want the distressed effect to go.
What do you need?
- Wire brush
- Leather boots
- Water
- Soap
- Sponge
Instructions:
Step 1. Gather all materials:
First of all, you will need to gather all of the materials that you will need to distress your leather boots. This includes a wire brush, leather boots, water, soap, and a sponge.
Step 2. Wet the boots:
Next, wet the boots with water. A sponge and some water will do the trick. Make sure that the boots are evenly wet. This will make it easier to complete the distressing process without damaging the boots. because if the boots are too dry, the wire brush will not be able to do its job as effectively.
Step 3. Apply soap:
After the boots are wet, you will need to apply soap. You can use any type of soap, but it is best to use mild soap. Apply the soap evenly over the boots. This will help to protect the leather while you are distressing it.
Step 4. Start distressing:
Once the soap is applied, you can start distressing the leather. Simply brush the wire brush over the leather in the direction you want the distressed effect to go. The longer you brush, the more distressed the leather will become.
Step 5. Rinse the boots:
Once you have achieved the desired level of distress, you will need to rinse the boots. Simply use a sponge and water to remove the soap. Additionally, this will help in getting rid of any leather fragments that may have come loose.
Step 6. Dry the boots:
After the boots are rinsed, you will need to dry them. You have the option to either let them get dry naturally or use a towel to dry them. Make sure that the boots are completely dry before you move on to the next step.
Step 7. Condition the boots:
Once the boots are dry, you will need to condition them. This will help in replenishing the natural oils in the leather and will prevent the boots from drying out. You can use any type of leather conditioner, but it is best to use one that is specifically designed for distressed leather.
Step 8. Finish distressing:
Once the boots are conditioned, you can finish distressing them. Simply brush the wire brush over the leather in the direction you want the distressed effect to go. The longer you brush, the more distressed the leather will become.
Step 9. Apply a sealant:
After you have achieved your desired level of distress, you will need to apply a sealant. This will prevent the leather from getting damaged and will preserve your desired distressed look for a longer duration. You can apply any type of sealant, but it is recommended to use one made expressively for leather.
Once you have finished all of these steps, you will have a pair of distressed leather boots that are sure to turn heads.
Method #3: Use a chemical distressing agent
The chemical distressing agent is a great way to achieve an even and consistent distressed look on your leather boots. You’ll want to use a good quality chemical distressing agent that is designed for use on leather.
What do you need?
- Chemical distressing agent
- Gloves
- Protective eyewear
- Old rag
Instructions:
Step 1. Gather all materials:
The first step is to gather all the necessary supplies. This includes a chemical distressing agent, gloves, protective eyewear, and an old rag.
Step 2. Prepare the work area:
Next, prepare your work area. Make sure it’s well-ventilated and that you have plenty of space to work around. Furthermore, keep in mind that this project has the potential to be somewhat messy, so be prepared. If possible, wear old clothes that you don’t mind getting ruined.
Step 3. Apply the distressing agent:
Now it’s time to apply the distressing agent. Put on your gloves and safety goggles, then pour a small amount of the distressing agent onto your rag. This part is important – you don’t want to pour the distressing agent directly onto your boots, as this can damage them.
Step 4. Rub the rag :
Once you’ve applied the distressing agent to your rag, it’s time to rub it onto your boots. Rub the rag in a circular motion until the entire surface of the boot is covered. You may want to apply more distressing agents to your rag as you go.
Step 5. Rinse and Repeat :
Once you’re happy with the amount of distressing on your boots, rinse them off with water. If you feel that you want a more distressed look, you can always repeat this process.
Step 6. Allow the boots to dry :
Once you’re done distressing your boots, allow them time to dry completely. Please be patient as it can easily take several hours for the boots to air dry naturally. If you’re in a rush, you can always hasten the process by using a hairdryer.
Step 7. Enjoy your new boots! :
Once they’re dry, you can continue to enjoy your new distressed leather boots. Make sure to show them to your friends and family!
What type of leather is used in boots?
Leather is a material that is created through the tanning of animal skin and hides. Its durability and flexibility make it the perfect material for a wide range of uses, including footwear. Whereas, Boots are a sort of shoe that covers the foot and ankle and are frequently constructed from leather.
There are a variety of leathers that can be used to make boots, including cowhide, calfskin, goatskin, and buffalo hide. Each type of leather has distinct qualities that make it better suited for a variety of applications. Cowhide, for example, is a strong and durable leather that is often used for work boots. Calfskin is a softer and more pliable leather often used for dressier styles of boots. Goatskin is a tough and durable leather that is often used for hiking boots or other styles of boots that will see a lot of wear and tear. Buffalo hide is a thick and durable leather that is often used for work boots or hunting boots.
No matter what type of leather is used, it is important to care for it properly to ensure that it lasts. Always use a mild soap and water solution to clean any kind of leather while being on the safer side of the bet. Make sure to keep your boots stored in cool and dry places when you are not wearing them. Don’t forget that conditioning the leather regularly will also help in keeping it soft and flexible and prevent it from becoming brittle and cracking.
How to identify genuine leather?
There are a few ways to distinguish genuine leather from fake ones.
1: Look for the label:
Most leather items will have a label that says “genuine leather” or “100% leather”. If the label is missing, or if it just says “leather” without specifying that it’s genuine, then it’s probably not.
2: Look for natural markings:
Genuine leather will often have natural markings such as scars, wrinkles, or veins. These markings are a reliable sign that the leather is genuine. This is because genuine leather is created from natural animal skin, which would have these distinct markings ingrained naturally.
3: Look for imperfections:
Genuine leather is a natural product, and as such, it will often have imperfections. This is something that you won’t find in fake leather. If you see a perfect piece of leather, it’s likely to be fake.
4: Look at the grain:
Genuine leather will have a natural grain pattern that is not uniform. The grain will also be slightly raised. This is because real leather is made from the upper layer of the hide, which has natural grains.
5: Smell the leather:
Genuine leather will often have a distinct smell that is not present in fake leather. This is because genuine leather is treated with certain oils and chemicals that give it a unique smell. If the leather you are inspecting does not have a smell, or if it smells synthetic, it is likely not genuine.
6: Feel the leather:
Genuine leather is often softer and more pliable than fake leather. This is because the animal’s skin has been treated with oils and chemicals to make it softer. Run your fingers over the leather to see if it feels soft and pliable. You can also feel the leather with your fingertips to see if it is soft and bendable.
7: Look at the pores:
Genuine leather will have obvious pores that can be seen with the naked eye. This is unlike fake leather, which has a smooth, plastic-like surface. If you look closely at genuine leather, you should be able to see tiny pores on its surface.
Pros and cons of distressing leather boots?
There are many factors to consider when deciding whether or not to distress your leather boots. The following list includes some pros and cons of distressing leather boots:
PROS
1: Gives boots a lived-in look:
One of the benefits of distressing leather boots is that this can give them a more lived-in look. This can be especially beneficial if you’re going for a more rugged or vintage-inspired aesthetic.
2: Can make boots more comfortable:
Distressing leather boots can also make them more comfortable. This is due to the leather becoming softer and breaking throughout the distressing process, which makes it more malleable and less prone to be uncomfortable.
3: Makes boots unique:
If you’re looking for a pair of truly unique boots, then distressing them yourself is a great option. This is because the results of distressing are never the same hence, each pair gets a unique look.
4: Can save money:
Buying a pair of already distressed leather boots can be quite expensive. Such that, distressing your boots yourself can be a terrific technique to achieve the desired aesthetic without breaking the bank.
CONS
1: Can be time-consuming:
One of the potential downsides of distressing leather boots is that they can be quite time-consuming. If you’re not careful, it’s quite common to go overboard and produce an overly distressed look or in some cases may even ruin the boots.
2: Can be difficult to get the right look:
Getting the right look when distressing leather boots can be difficult. If you’re not experienced with the distressing process, it’s easy to make mistakes that can ruin the look of your boots.
3: Can damage the leather:
If you’re not careful, the distressing process can damage the leather of your boots. This can lead to premature wear and tear, and it can make your boots look old and worn before their time.
4: Can be expensive:
If you’re not careful, the cost of distressing leather boots can add up. You’ll need to purchase the right products and tools, and you may even need to pay someone to help you if you’re not experienced with the process.
How to care for distressed leather boots?
When your leather boots become distressed, it’s important to take care of them so they’ll last longer. Here are a few tips on how to care for distressed leather boots:
1: Make sure to clean them regularly.
Similar to any other article of clothing, your leather boots can also accumulate dirt and debris over time and causing them to wear down at a quicker pace. Hence, be sure to wipe them down with a damp cloth or brush after each wear.
2. Apply a leather conditioner.
This will help keep the leather soft and supple, preventing it from cracking and becoming damaged.
3. Polish them regularly.
This step is optional, but polishing your boots will help give them a nice shine while also providing another layer of protection.
4. Store them properly.
When you’re not wearing your boots, be sure to store them in a cool, dry place out of direct sunlight. This will lessen the likelihood of the leather drying out and cracking.
You can maintain the excellent appearance of your distressed leather boots for many years by following these easy suggestions!
Things you should keep in mind while distressing leather boots?
Assuming that you would like tips on how to distress leather boots: There are a few things you should keep in mind while distressing leather boots.
1: Keep the cuts shallow-
You don’t want to cut too deeply into the leather and ruin the boots. Shallow cuts allow you the control the amount of damage, in case you may run into any problems. While in case, you go with the deeper cuts, the damage may be irreversible.
2: Be careful not to overdo it-
Too much distressing can make the boots look cheap and fake. This is a difficult line to walk, but a good rule of thumb is to stop once the leather begins to look worn through in places. If in doubt, it’s better to err on the side of caution and leave some of the original finish intact.
3: Make sure you even out the distressed areas-
You don’t want one boot to look significantly more distressed than the other. Try to make the wear and tear look more natural by spreading it out evenly. If you’re going for a rustic look, don’t make the distressed area too perfect. This will diminish the whole appeal of your distressed look.
4: Choose the right type of leather-
There are a few different types of leather, and each type will need to be distressed differently. For example, full-grain leather is thicker and more durable, while nubuck leather is softer. This means that you may have to distress different types of leather using different ways.
5: Use the proper tools-
You don’t want to use something that will damage the leather. Instead, use a leather distressing tool or even a dull knife. This will allow you to obtain the desired impact without damaging your boots.
6: Protect the soles of the boots-
You don’t want to ruin the soles when you’re distressing the leather. Use an old towel or a piece of cardboard to protect the soles while you’re working. This will keep them safe from being scratched or nicked.
Related Questions:
Yes, you can distress leather boots. However, you would need to purchase a distressing kit for it, which contains leather dye, paint, and other materials. Follow the instructions included with the kit to achieve the desired look.
You can make your boots look rustic by wearing them in, or by adding some scuffs and scratches. You can also buy “distressed” boots that already have a worn-in look.
You can use a variety of techniques to give your boots a distressed look. One way is to use a boot conditioner or boot polish that has a colorant in it. Another way is to apply a dark stain to the leather. You can also try using shoe cream or mink oil to darken the leather. Finally, you can use a boot spray that contains a colorant. Whatever technique you decide to use, make sure to test it on a tiny portion of the boot first to see how the color will turn out before using it on the full boot.
The best method for maintaining your leather boots is to keep them clean and dry. You can clean them with water and mild soap, and then allow them to dry naturally. You should also apply a conditioner or cream to the leather to help keep it supple.
You should polish your leather boots every few weeks to help keep them in good condition. You can use a commercial boot polish, or you can make your own by mixing lemon juice, olive oil, and vinegar.
The best place to keep leather boots is somewhere cool and dry. Additionally, you can pack them with newspaper to prevent creases and help them absorb moisture.
There are a few steps you may use to extend the life of your leather boots:
1. Use a leather conditioner regularly. Use leather conditioner regularly to keep it soft, supple, and water-repellent.
2. Avoid getting the boots wet if possible. If they do become wet, pack them with newspaper and allow them to dry naturally.
3. If the boots start to look dull, you can use a boot polish to help restore the shine.
4. If the leather begins to crack, you can restore it with a leather repair kit.
5. Make sure to always keep your boots stored in cool and dry places when they are not in use.
Following these recommendations can help you get a lot of value out of your leather boots. If they start to show too much wear, however, it’s probably time to invest in a new pair.
If your leather boots get wet, you should remove them immediately and let them air dry. Avoid placing them near a heat source as this may cause the leather to become too dry and brittle. Additionally, you can use a cream or conditioner for leather to prevent the leather from losing its needed moisture.
If your leather boots are starting to smell, you can try using a commercial boot deodorizer. Alternatively, you could also fill your boots with baking soda and leave them overnight. Remove the baking soda the next day and wash them to get your boots in fresh condition.
If you accidentally get a stain on your leather boots, you can try using mild soap and water to remove it. You can also use a leather conditioner or cream to help nourish the leather and prevent the stain from setting in. If the stain is stubborn, you may need to take the boots to a professional cleaner.
There are a few things you can try to remove the dent from your leather boots. To start, try warming up the area around the dent with a hairdryer set to low heat. Then, carefully push the dent out from the inside using your fingers. If that doesn’t work, try using a can of compressed air to blow the dent out. If all else fails, you can try using a leather repair kit to fill in the dent and make it less noticeable.
You can attempt to save your leather boots by doing a few different things. Start by stuffing them with newspaper to retain their form and soak up any excess moisture. Next, try using a leather conditioner or boot polish to help moisturize the leather and prevent further cracking. If your boots are still wet, you can try using a hairdryer on the lowest setting to slowly dry them out. Finally, if your boots are beyond repair, you can always try to sell them for parts or take them to a local cobbler for repair.
You can try a few things to help restore the color of your leather boots. You can start by applying some leather conditioner or polish. Use a gentle cloth to rub a small amount of the conditioner into the boots. Combine one part vinegar with two parts water, and then rub the solution into the boots using a soft cloth. Once done, place the boots in a cool, dark area to dry. Finally, you can try using a leather dye. Apply the dye to the boots with a soft brush and let them dry in a cool, dark place.
There are a couple of things you can try if your leather boots have gotten wet and are starting to shrink. To start, try stuffing them with newspaper or cloth to soak up the moisture. Next, put them in a warm place to dry (but not in direct sunlight, which can damage the leather). Finally, once they’re dry, apply a leather conditioner to help keep them from shrinking further. If your boots are still shrinking, you may need to get them stretched or resized by a professional.
There are a few things you can do to soften your leather boots. You can try using a boot stretching spray or cream, heating them, or using a boot tree. If your boots are extremely stiff, you may need to have them stretched by a professional shoemaker or a cobbler.
Conclusion paragraph:
In conclusion of how to distress leather boots, there are a few key things to remember. First, if you get a stain on your leather boots, try using mild soap and water or a leather conditioner to remove it. Second, if you drop your leather boots and they dent, you can try using a hairdryer or compressed air to remove the dent. Finally, if your leather boots get wet, try stuffing them with newspaper and placing them in a warm place to dry. If all else fails, you can take them to a professional cobbler or shoemaker for repair.
Ella John created BootsSolution.com with the vision of helping people to find the perfect boots for any occasion. As an expert in the field of footwear, she has created a comprehensive guide to finding the perfect boots. With her BA (Hons) in Footwear Design from De Montfort University, UK, Ella John has been writing about boots for several years. On BootsSolution.com you can find helpful information about the latest trends, tips for taking care of your boots, and advice on how to choose the right pair. Ella’s mission is to provide her readers with the best possible advice and help make sure that everyone can look their best in a perfect pair of boots. So if you’re looking for the information and inspiration you need to find the perfect boots, look no further than BootsSolution.com.