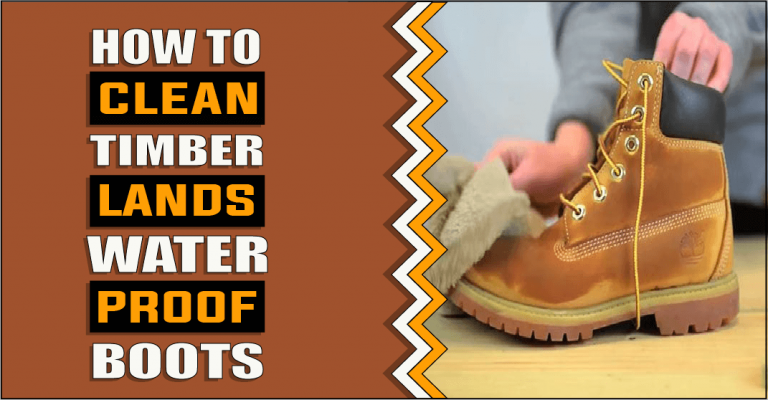
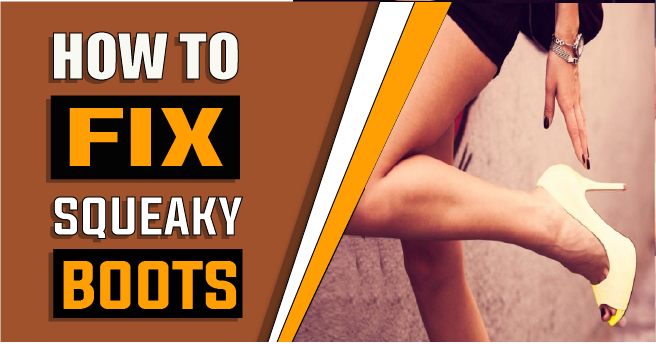
How to Fix Squeaky Boots – 5 Effected Methods
If you’re like the majority of people, you undoubtedly adore your boots. Who wouldn’t want to when they keep your feet warm and protected from the elements? Plus, they even add a touch of style to any outfit. However, there is one thing that can ruin the joy of wearing a perfect pair of boots, and that is squeaking. If your boots are making a squeaky noise every time you walk a step, don’t worry – you’re not alone. This is a common problem for many people, and there are several ways to fix this annoyance, and it doesn’t require too much effort. In this blog post, we will give you a detailed introduction to how to fix squeaky boots. We’ll also show you some of the best methods for doing so, as well as share our top tips for keeping your boots in good condition. Read on to learn more!
Let’s discuss how to fix squeaky boots
Although squeaky boots are quite annoying as well as can be embarrassing, thankfully, there are a few ways to fix them. Let’s take a look at five methods that you can use to stop your boots from making that annoying noise.
Method 1. Use Graphite Powder-
Graphite powder is a great way to fix squeaky boots. This is because it helps to lubricate the leather and reduce friction between the materials.
What do you need?
- Graphite powder
- A clean cloth
- An old toothbrush (optional)
Instruction:
Step 1: Gather all materials:
To start, you must first gather all the necessary supplies. This includes graphite powder, a clean cloth, and an old toothbrush (optional).
Step 2: Apply graphite powder:
Next, you will need to apply the graphite powder to the areas of your boots that are squeaking. You can use a clean cloth or an old toothbrush to help spread the powder. Because of this, the leather will be lubricated, and the friction between the material will be reduced. Make sure you don’t get any graphite powder on your clothes, as it can be quite difficult to remove.
Step 3: Wipe away excess powder:
After you have applied the graphite powder, you will need to wipe away all the excess powder. You can use fresh cloth to accomplish this. If there is still some powder left on your boots, you can repeat steps 2 and 3 until the powder is gone or the squeaking stops.
Step 4: Enjoy your quiet boots:
Once you have finished applying the graphite powder, now you can enjoy your quiet boots. This is one of the quickest and easiest ways to fix squeaky boots.
Method 2. Use Petroleum Jelly-
Petroleum Jelly is a great way to stop your boots from squeaking. This is because it will lubricate the areas where your boot is rubbing against itself.
What do you need?
- Petroleum Jelly
- A rag
- An old toothbrush (optional)
Instructions
Step 1: Gather all materials:
Before you start, make sure you have all the materials you need. This includes petroleum jelly, a rag, and an old toothbrush (optional). This will make the process go much smoother.
Step 2: Apply petroleum jelly to the areas that squeak:
You will want to apply petroleum jelly to the areas of your boot that squeak. To apply the jelly, you can either use your finger or an old toothbrush. Pay more attention to areas from where the squeaking noise is coming. And don’t forget to check all the crevices, as that’s where the noise usually comes from.
Step 3: Wipe away any excess:
Once you’ve applied the jelly, wipe away any excess that might be on the outside of your boot. You surely don’t want to leave any behind, as it can attract dirt and debris.
Step 4: Test your boots:
Finally, put your boots on and walk around to see if the squeaks have stopped. If they haven’t, you can try repeating the process until they do.
Method: 3 – Use Talcum Powder
Talcum Powder is a great way to reduce friction and stop your boots from squeaking. This method is best used on new boots that are starting to squeak. Let’s take a look at how to use talcum powder to fix your squeaky boots.
What do you need?
- Talcum powder
- A sock
- Scissors
Instruction:
Step 1: Gather all materials:
Before you start, make sure you have talcum powder, a sock, and a pair of scissors. This will significantly simplify the process.
Step 2: Cut the sock’s toe off:
Once you have all of your materials, cut the toe off of the sock. This will create a small pouch that you can fill with talcum powder. This is process is essential as you want the talcum powder to be in direct contact with the boots. If the talcum powder is too far away, it won’t be as effective.
Step 3: Fill the sock with talcum powder:
Next, fill the sock with talcum powder. Make sure to fill it up enough so that there is a good amount of powder in the toe of the sock. This is important because you want to make sure the talcum powder has a chance to work its way into the creases of the boot.
Step 4: Put the sock on your foot:
After you have filled the sock with talcum powder, put it on your foot like you would with a regular sock. Make sure that the talcum powder is evenly distributed in the toe of the sock. If not, it may be necessary to add extra powder. But don’t add too much, or it will be difficult to push the talcum powder into the boot.
Step 5: Put your boots on:
Now that you have the talcum powder sock on your foot put your boots on like normal. The talcum powder will help to reduce friction and will stop the boots from squeaking.
Method: 4 – Soap and water:
Soap and water are common household items that can be used to fix squeaky boots. However, they show the best results on leather boots.
What are you going to need for this?
- A bar of soap
- A bowl of water
- A cloth
- Your squeaky boots
Instruction:
Step 1: Gather all materials:
First, gather everything you will need to fix your squeaky boots. This includes a bar of soap, a bowl of water, a cloth, and your boots.
Step 2: Wet the cloth:
Wet the cloth with water. Ensure that the fabric is moist but not drenched. This will help to ensure that your boots do not get soaked. If the cloth is too wet, it could damage your boots.
Step 3: Rub soap on the cloth:
Then, rub the bar of soap onto the wet cloth. Continue rubbing until the soap is fully lathered. This will make it so that only the soap lather comes in contact with the boot instead of water droplets in the cloth.
Step 4: Rub soap on the boots:
Once the cloth is lathered with soap, begin to rub it on the squeaky areas of your boots. Be sure to focus on any areas that make noise when you walk. Soon the soap will fill the cracks and crevices that are creating the noise.
Step 5: Wipe off excess soap:
After you have rubbed the soap into the boots, use the cloth to wipe off any excess. Be sure to remove all of the soap, or else it can damage your boots if left on for too long.
Step 6: Allow boots to dry:
At this point, just let your boots air out. Depending on the construction of your boots, this could take a while. However, once the boots are dry, you will notice that the squeaks are gone!
Method: 5 – WD-40:
WD-40 is a multi-purpose product that can be used to address a range of problems, including squeaky boots. This method is particularly effective on older boots that may be starting to show their age.
What do you need?
- WD-40
- A clean cloth
- An old toothbrush
Instruction:
Step 1: Gather all materials:
First, make sure you have everything you need to fix your squeaky boots. This includes WD-40, a clean cloth, and an old toothbrush.
Step 2: Apply WD-40 to the concerned areas:
Once you have everything, apply WD-40 to the areas of your boots that are squeaking. You can apply WD-40 either as a spray or an aerosol. If you’re using the spray, be sure to hold it about 6 inches away from the boot and apply a light coat.
Step 3: Allow the WD-40 to penetrate:
After you’ve applied WD-40 to the affected areas, allow it to penetrate the boots for a few minutes. This will give it time to work its way into the crevices and loosen any dirt or grime that may be causing the squeaking. This step is especially important if your boots are new and the squeaking noise is caused by tightness in the leather.
Step 4: Wipe away excess WD-40:
Once the WD-40 has had time to penetrate, use a clean cloth to wipe away any excess. You don’t want to leave too much WD-40 on your boots, as it can attract dirt and grime. If you’re using the aerosol WD-40, you can simply wipe away the excess with the nozzle.
Step 5: Repeat as necessary:
If the squeaking persists, you may need to repeat steps 2-4 again and again until it stops. Once the squeaking has stopped, you can apply a small amount of WD-40 to the affected areas to prevent it from happening again.
Now you know five techniques for preventing your boots from squeaking. You can try a few of them to determine which one works best for you. If all else fails, you can always take your boots to a professional to have them fixed.
What are Squeaky Boots?
Squeaky boots are a type of footwear that makes a noise when the wearer walks. Such boots are usually made of rubber or plastic and have a small hole in the sole that produces a squeaking sound. Squeaky boots are often worn by children, as they find the noise amusing. Adults, on the other hand, wear them for practical or fashion reasons. Squeaky boots first became popular in the early 20th century and were often worn by clowns and performers. Today, they are still worn by some people for comedic effect but are also popular among those who enjoy wearing novelty items or by those who want to make a statement with their clothing.
Locate the source of the squeak in boots.
There can be many obvious reasons why your boots squeak. Let’s explore some of the most often sources in more detail:
1: Worn-out boot soles –
One of the most common causes of squeaky boots is simply worn-out soles. Over time, the soles of your boots can become worn down, causing them to flex and creak as you walk. If you notice that your boots are starting to squeak, it’s a good idea to replace the soles as soon as possible.
2. Loose boot laces –
Another common source of squeaks is loose boot laces. When your laces are loose, they can rub against the inside of your boot and create a squeaking sound. Be sure to keep your laces tight to avoid this issue. This is especially important if you’re wearing boots with metal eyelets, as they can amplify the sound of the squeak.
3. Poorly-fitting boots –
If your boots don’t fit properly, they can rub against your feet and cause a squeaking noise. Ensure that the boots you purchase are the appropriate size. This is especially critical if you have broad feet.
4. Dirty or wet boots –
Another common source of squeaks is dirty or wet boots. If you walk through mud or puddles with your boots on, the dirt and water can get trapped in the soles and cause them to squeak. To prevent this from occurring, ensure that your boots are frequently cleaned and kept dry.
5. Broken boot heel –
Broken boot heels can also cause your boots to squeak. If the heel of your boot is broken or damaged, it can rub against the rest of the boot and create a squeaking noise. To fix this, you may need to swap the current heel of your boot with a new one.
6. Worn-out insoles –
Worn-out insoles are a common source of a squeak in boots. If your insoles are worn out, they may not provide enough cushioning and support, which can cause your feet to slip around inside the boots and create a squeaking noise.
7. Loose boot nails –
If you have ever worn a pair of boots with loose nails, you know that they can be quite annoying. The nails will often squeak as they move around inside the boot. If you are having this problem, simply replace the nails with new ones.
8. Damaged boot zippers –
Damaged or poorly-functioning boot zippers can also cause your boots to squeak. If the teeth on your boot’s zipper are damaged, they can catch on the fabric of your boot and create a squeaking noise. To fix this, you’ll need to replace the damaged zipper teeth or replace the entire zipper.
9. Worn-out boot lining –
Over time, the lining in your boots can become worn out. This can cause squeaking as you walk. If you notice that your boots are beginning to squeak, it’s a good idea to check the lining and see if it needs to be replaced.
10. Poorly-fitting socks –
Your boots may make a squeaking sound if the socks that you are wearing are either too tight or too loose. Make sure to choose the right size socks and ensure that they don’t get bunched up inside your boot.
If you’re having trouble pinpointing the source of your squeaky boots, it’s a good idea to take them to a professional for an inspection. A professional bootmaker or cobbler will be able to identify the source of the squeak and make the necessary repairs.
Related Questions:
Yes, you can stop your shoes from squeaking without taking them to a cobbler. There are a few different ways that you can do this. One way is to put baby powder or cornstarch in your shoes. Another way is to wear thicker socks. You can also try spraying your shoes with WD-40.
There are a few reasons why your boots might be squeaking. It could be because they are new and the leather has not yet been broken in, or because they are made of suede and need to be treated with a dryer sheet. Another reason could be that you need to apply some baby powder or cornstarch to the inside of your boots or place a small piece of cardboard in each boot where they rub together. If your boots continue to squeak even after trying these methods, you can take them to a cobbler or shoe repair shop to have them professionally stretched.
There are a few measures that you can take to stop your shoes from squeaking. First, make sure to clean and lubricate your shoes regularly. The second measure is to reduce the friction between the foot and the shoe. If you know your shoes tend to squeak, you may also want to avoid wearing them in situations where you need to be quiet, such as at work or in a library.
While a squeaky shoe can be annoying, there are a few things you can do to try to fix the problem. First, try spraying the shoe with WD-40 or another lubricant. If that doesn’t work, you can also try inserting a newspaper or a cotton ball bit to fill up the gaps. If the squeak persists, you may need to take the shoe to a cobbler or shoe repair shop to have it repaired.
If you think your shoes are squeaking because they’re too tight, you may be right! Excessively tight shoes might cause the materials to rub against each other, resulting in a squeaking sound. To fix this problem, simply loosen the shoe’s laces or straps to give your feet more room. You may also need to buy a larger size shoe if the current size is causing too much discomfort.
Conclusion paragraph:
So in conclusion of how to fix squeaky boots, we say squeaky boots can be a nuisance, but they don’t have to remain that way. Hopefully, one of the five solutions we’ve provided you will help you repair them. If not, keep trying until you find the solution that works best for your boots and your lifestyle. And remember, if all else fails, take them to a professional cobbler—they should be able to fix them right up.
Ella John created BootsSolution.com with the vision of helping people to find the perfect boots for any occasion. As an expert in the field of footwear, she has created a comprehensive guide to finding the perfect boots. With her BA (Hons) in Footwear Design from De Montfort University, UK, Ella John has been writing about boots for several years. On BootsSolution.com you can find helpful information about the latest trends, tips for taking care of your boots, and advice on how to choose the right pair. Ella’s mission is to provide her readers with the best possible advice and help make sure that everyone can look their best in a perfect pair of boots. So if you’re looking for the information and inspiration you need to find the perfect boots, look no further than BootsSolution.com.