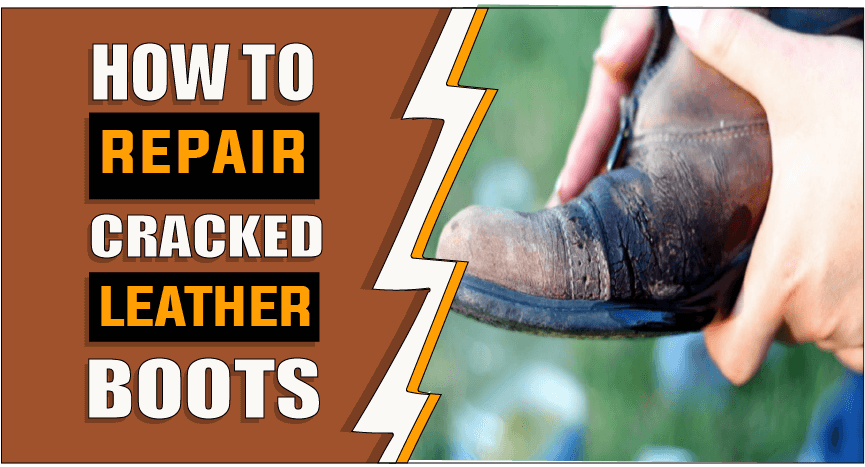
How to Repair Cracked Leather Boots – 4 Easy Methods
Leather boots are a must-have in any fall or winter wardrobe. Not only do they keep your feet warm and protected from the elements, but they also add a touch of elegance to any outfit. However, what happens when your favorite pair of leather boots start to show signs of wear and tear, and one or more of the leather panels is cracked? Don’t worry there are several ways you can go about repairing them so they look good as new. In this post, we’ll discuss the different methods for repairing cracked leather boots, as well as provide some helpful tips along the way. So, if your beloved leather boots have seen better days, read on! We’ll show you how to repair cracked leather boots in no time.
Let’s discuss how to repair cracked leather boots?
There is no doubt that leather boots are some of the most stylish and durable footwear options available. However, even the best quality boots can eventually succumb to wear and tear, developing cracks and other signs of damage. When this happens, it’s important to take the necessary steps to repair the boots so that they can continue to be worn for years to come. With a little time and effort, it’s relatively easy to fix cracked leather boots and make them look new again. Here are several methods for repairing cracked leather boots:
Method 1: How to repair leather boots cracks with Vinegar and Oil-
Vinegar and Oil can be used to repair cracked leather boots in some ways. For example, vinegar can be used to clean the boots and remove any dirt or debris that may be present. Additionally, it can also help to soften the leather, making it more malleable and convenient to work with. To use this method, let’s take a look at the steps you’ll need to follow:
What do you need?
- 1/4 cup of white vinegar
- 1/4 cup of olive oil
- A clean cloth
- A bowl
- A brush (optional)
Instructions:
Step 1. Gather all materials-
First, you’ll need to make sure that you have all the materials. This will facilitate a more streamlined procedure while avoiding any potential delays.
Step 2. Combine the vinegar and oil-
First, take a bowl and combine the white vinegar and olive oil in it. You can also use a brush to mix the two ingredients if you prefer. This will create a natural cleaner and conditioner for your boots.
Step 3. Apply the mixture to the boots-
Dab a clean cloth into the mixture and use the moist cloth to apply the mixture to the creases of your boots. Make sure the damaged area is completely covered. This will help to clean the boots and soften the leather. Similarly, if you’re repairing multiple cracks, you may need to apply the mixture several times.
Step 4. Allow the mixture to sit-
Allow the mixture to sit on the leather for at least 30 minutes so that it can penetrate the material and begin repairing the cracks. Furthermore, you can keep on doing these steps until the boots are in good shape again.
Step 5. Buff the boots-
Once the mixture has had a chance to work, buff the boots with a clean cloth to remove any excess. This will also help to restore the shine of the leather and restore its natural beauty.
Step 6. Wipe away the excess-
If there is still some excess mixture remaining on the boots, wipe it away with a clean cloth. You may also need to buff the boots again to achieve the desired results.
Step 7. Repeat as necessary-
Depending on the severity of the damage, you may need to repeat this process a few times before the cracks are completely repaired. However, even one treatment can make a big difference in the overall appearance of your boots.
Method 2: How to repair leather boots cracks with Super Glue-
This is most likely the fastest and simplest method for repairing leather boot cracks. Furthermore, super Glue can be bought at most hardware stores and is quite cheap. Let’s take a look at the steps below to understand how to use this method:
What do you need?
- Super Glue
- A toothpick
- Cotton balls
- Water
- Paper towel
Instructions:
Step 1. Gather all materials-
Make certain that you have all the required materials on hand before you start the project. You’ll need super glue, a toothpick, cotton balls, water, and a paper towel.
Step 2: Clean up the area that needs fixing.
First, clean the cracked region of the boot lightly with a paper towel. Be sure to remove any dirt, debris, or moisture from the surface. As this will make it easier for the glue to stick to the leather.
Step 3: Fill up the crack with super glue.
Next, apply some small bits of super glue into the cracks using a toothpick. Avoid using too much as it can decrease the efficiency of the repairs and can even make the leather stiff and rigid. If the crack is large, you may need to apply the glue in several small beads rather than one continuous line.
Step 4. Press the leather together-
Press the two sides of the crack together. Hold them in place for a few seconds to allow the glue to begin bonding the two pieces.
Step 5. Dab away excess glue-
Use a cotton ball dipped in water to remove any excess glue that may have squeezed out from the crack. Be sure to dab rather than rub, as this can cause the glue to spread and make the repair less effective.
Step 6. Allow the glue to dry-
Set the boot aside and allow the glue to fully dry. Depending on the glue used, this can take anything from a few hours to overnight. Once dry, the boot should be as good as new!
Method 3: How to repair leather boots cracks with leather conditioner-
One of the best methods for fixing cracks in leather boots is through a leather conditioner. It works by softening the material and helping to fill in any voids or gaps in the surface. As, not only does it improves the aesthetic of the boots, but it also helps to extend the boot’s life. Let’s look at how leather conditioner can be used to fix cracks in leather boots:
What do you need?
- Leather conditioner
- Soft cloth
- Water
- Bowl
- Sponge
Instructions:
Step 1: Gather all materials-
Ensure that you have obtained all the required items on hand before you begin. You’ll need a leather conditioner, a soft cloth, water, a bowl, and a sponge.
Step 2: Clean the boots-
The first step is to clean the boots so that the leather conditioner can be applied properly. To do this, simply clean the exterior of the boots with a moist sponge or a cloth. Make sure to clean up all dirt, dust, or other debris that might be on them.
Step 3: Apply the leather conditioner-
Next, treat the boots’ leather with conditioner. Again, you can use a sponge or a cloth to do this. In addition, make sure to spread the conditioner across the whole surface of the boot.
Step 4: Let the conditioner absorb-
After applying the conditioner, give it at least 15 minutes to get absorbed. This will allow it to penetrate the leather and begin fixing any fractures that may be present.
Step 5: Buff the boots-
After the conditioner has had time to soak in, buff the boots with a soft cloth. This will help to further smooth out any cracks that may be present and leave them looking like new again.
Step 6: Repeat as necessary-
However, you might need to do this multiple times, depending on how severe the damage is. Lastly, don’t forget to apply the conditioner evenly and allow it to soak in fully before buffing the boots again.
Method 4: How to repair leather boots cracks with Beeswax-
If you are not so keen on using chemicals and prefer a more natural solution then you would love beeswax. Beeswax can be used to fix small cracks in the leather. This method is best used for small cracks that are not too deep. Let’s look at how you can pull this method off:
What do you need?
- A block of beeswax
- A clean cloth
- A hairdryer
- A small paintbrush
Instructions:
Step 1. Gather all materials-
First, make sure you have everything you need to complete the repair. You’ll need a block of beeswax, a clean cloth, a hair dryer, and a small paintbrush.
Step 2. Warm the beeswax-
Place the block of beeswax in a bowl and set it over a pot of boiling water. Allow the wax to melt until it becomes pliable. You can also use a hair dryer to warm the wax if you don’t have a pot of boiling water in hand.
Step 3. Apply the wax to the crack-
Once the wax is melted and pliable, use the paintbrush to apply it directly to the crack. Make sure to fill the crack with wax. This will help seal it up and stop it from getting worse.
Step 4. Smooth out the wax-
After the crack is filled with wax, use a cloth to smooth out the surface. Make sure there are no air bubbles and that the wax is spread out evenly.
Step 5. Allow the wax to cool and harden-
Set the boot aside and allow the wax to cool and harden. This usually takes about 30 minutes. Once the wax is hard, it will create a waterproof seal that will help to protect the leather from further damage.
Step 6. Repeat as needed-
If the crack is still visible after the first application of wax, you can repeat the steps until it is no longer noticeable.
So, there you have it, these 4 methods that you can use to repair cracks in leather boots. Choose the method that best meets your needs. And always remember to take care of your boots so that they can last for years to come!
How do protect leather boots from cracking?
Cracking leather is a common problem, especially with boots. Such that leather can crack for several reasons, including dryness, exposure to sunlight, extreme temperatures, and even due to age. Even though there are certain methods for avoiding cracks, fixing them once they occur is not always a good choice.
1: Keep your leather boots clean and dry-
Leather can get drier from dirt and dust, which increases the likeliness of it cracking. So, be sure to clean your boots regularly with a soft cloth or brush. It’s also important to keep them away from direct sunlight and heat sources, which can further dry out the leather.
2: Protect your leather boots from the elements-
Protect your boot by keeping them in a cool, dry spot when they are not in use. If you live in a particularly cold or hot climate, consider using boot trees or shoe inserts to help maintain their shape. You may also want to apply a waterproofing spray or cream before wearing them in wet weather.
3: Break in your leather boots gradually-
Wearing new boots for long periods can also cause them to crack. Avoid this by gently breaking them in by initially wearing them for brief periods. Once they’ve been broken in, they’ll be more resistant to cracking.
4: Use a leather conditioner-
A leather conditioner keeps the leather soft and pliable so it doesn’t crack. Be sure to apply it evenly and according to the manufacturer’s instructions.
5: Polish your leather boots-
Polishing your boots with a wax-based polish can also help keep them from cracking. The polish will form a protective barrier on the surface of the leather, keeping it from drying out.
6: Avoid using harsh chemicals-
Chemicals that are too strong can damage leather and make it more likely to crack. Hence, when cleaning your boots, be sure to use only mild soap and water. You should also avoid using alcohol-based products, as they can dry out the leather.
7: Have your leather boots professionally cleaned-
If your boots are exceptionally filthy or soiled, you may want to consider having them professionally cleaned. This is a good option if you don’t feel confident and comfortable about cleaning it yourself.
Now you know seven things that you can use to keep your leather boots from cracking. Follow these tips and you will be able to keep your boots in good condition for years to come.
What Causes Leather Boots To Crack?
Leather boots are a fashionable and functional choice for footwear, but they require extra care to maintain their appearance. One problem that you may encounter is cracks developing in the leather. Even though this is annoying, there are things you can do to stop or fix cracked leather boots.
1: Wear and tear-
Wear and tear is the most prevalent cause of cracked leather. Mainly because the leather gets brittle and more prone to crack as it dries. This is especially the case if your boots are often in the sun or near other heat sources. If you live in a dry climate, this can be a problem even if you don’t wear your boots very often.
2: Poor quality leather-
Another common cause of cracks is using poor-quality leather. Leather that is too thin or not properly treated is more likely to crack than higher-quality leather. When buying new boots, be sure to check the quality of the leather and make sure it will be durable enough to withstand regular wear.
3: Improper care-
Leather boots require special care to stay in good condition. If you don’t clean and polish your boots regularly, the leather can dry out and crack. So, when caring for your leather boots, be sure to follow the guidelines provided by the manufacturer.
4: Folding or creasing-
If you fold or crease the leather while wearing your boots, it can cause cracks to form. Be careful not to scrunch up the leather when you put your boots on or take them off.
5: Poorly made boots-
Sometimes, cracks can also be caused by poorly made boots. If the stitching is not done properly or the leather is not cut correctly, it can cause the boot to crack. When buying a new pair of boots, be sure to check for any defects in the construction.
These are some of the most typical causes of leather boot cracks. So, if you take proper care of your boots and buy a pair made of high-quality materials, you can avoid most problems.
How to know if your leather boots are worn out and need to be fixed?
It’s difficult to detect if your leather boots are ruined to a substantial level and need to be repaired. However, certain signs can help you determine if your boots require some repair work.
1: Cracks or scuffs on the Boot’s Surface:
If you notice any cracks or scuffs on the surface of your leather boots, then it is a sure sign that they require some repair work. Cracks and scuffs on the surface of the boots can be caused due to several reasons such as dryness, exposure to sunlight and extreme weather conditions, etc.
2: Squeaking Sounds while Wearing the Boots:
Another sign that your leather boots need repairing is if you hear squeaking sounds while wearing them. This usually happens when the leather of the boots dries out and starts to stiffen up.
3: The Boots feel Uncomfortable:
If you notice that your leather boots are starting to feel uncomfortable, then it is another sign that they require some repair work. This is typically caused by the leather drying out and losing its flexibility.
4: The Boots Look Old and Worn Out:
If your leather boots look old and worn out, then it is a sure sign that they need to be repaired. Leather boots can lose their color and shine over time due to dirt, debris, grime, etc.
5: The Boots are Falling Apart:
If you notice that your leather boots are falling apart, then it is a clear sign that they need to be repaired immediately. This usually happens when the stitching of the boots comes undone or the leather starts to tear apart.
If you see any of these indicators, you should take your leather boots to a specialist for repairs. Leather boots are a significant investment and should be taken care of properly.
Related Questions:
You can try to fix cracks in boots with petroleum jelly, but it is not a guaranteed fix. Petroleum jelly can help temporarily seal the cracks, but it is not a permanent solution. If you are looking for a more permanent fix, you may want to consider using a boot repair kit or taking the boots to a professional cobbler.
While it is possible to repair cracked leather, it is not always easy. As there can be numerous causes of cracks, including dryness, pressure, heat, inappropriate use, etc. The best way to prevent cracks is to keep your leather products properly moisturized and conditioned. If you do get a crack, you may be able to repair it with a leather repair kit or by taking it to a professional.
While it is not unusual for leather boots to crack after extended use, it is generally not considered normal. If your boots are cracking, it is likely due to either a poor quality of leather or improper care. To avoid boot cracking, be sure to purchase boots made from high-quality leather and care for them properly.
The best way to save cracked leather shoes is to use shoe polish or cream. You can gently apply it evenly to the surface of the shoes using a cloth or brush. Wait until the shoes are completely dry to put them back on. To get the desired results, you may need to repeat this process more than once.
Conclusion paragraph:
In conclusion of so how to repair cracked leather boots, we have listed four different methods for repairing cracked leather boots. It’s important to remember that prevention is the best cure, so try to take measures to protect your leather boots from cracking in the first place. But if a disaster does strike and your beloved boots start to show signs of age and wear, don’t despair – any one of these methods should do the trick and get them looking good as new in no time. We hope that you have gained some useful information from this post and that your next experience dealing with cracked leather goes seamlessly!
Ella John created BootsSolution.com with the vision of helping people to find the perfect boots for any occasion. As an expert in the field of footwear, she has created a comprehensive guide to finding the perfect boots. With her BA (Hons) in Footwear Design from De Montfort University, UK, Ella John has been writing about boots for several years. On BootsSolution.com you can find helpful information about the latest trends, tips for taking care of your boots, and advice on how to choose the right pair. Ella’s mission is to provide her readers with the best possible advice and help make sure that everyone can look their best in a perfect pair of boots. So if you’re looking for the information and inspiration you need to find the perfect boots, look no further than BootsSolution.com.